This long-term benefit is outstanding as well. You can observe your efforts bills drop by approximately 15 in order to 25 % based on your weather in addition to active amounts of warmth. And you will in addition be entitled to the tax credit ratings about the expense of your warmth.

To demonstrate you tips on how to get the job done right, most of us questioned your skilled to express their methods for creating the project proceed effortlessly in addition to enable you to prevent the top several attic-insulation mistakes.
Seal leaks
Yank back the existing warmth in addition to utilize increasing bottle of spray froth in order to close any kind of breaks all-around plumbing water lines, ceiling perforations in addition to slots where by electric powered wire connections snake by means of. “Make confident in order to close all the way up about the water pipe, ” says Olson. Pertaining to breaks 1/4 inside. as well as a smaller amount, utilize caulk rather than increasing froth.
Add ventilation
Yank the existing warmth from your roof. Placement the newest in-take chute therefore the bottom part expands 6 inside. to the overhang in addition to staple that in location. Olson recommends using a contract stapler instead of the retracted stapler. “It’s additional precise in addition to there’s a smaller amount chance you’ll crumple your chute. ”
“In 95 pct on the households most of us work with, your in-take chutes usually are missing out on as well as aren’t correctly set up, ” says Olson. With out these, you’re not having the almost all through your insulation’s R-value since oxygen would need to move correctly on the eaves to eliminate wetness within the wintertime in addition to temperature within the summer time.
To ensure active chutes aren’t impeded, stand within a darker attic to see whether light on the eaves is selection throughout the vents. Exchange any kind of chutes which might be impeded, ruined as well as missing out on. You’ll uncover equally plastic-type material in addition to froth in-take chutes in the home facilities. Olson advises employing froth chutes. “They’re additional strict in addition to there’s a smaller amount prospects for these having crumpled as well as squeezed any time you’re putting in these.” Yank back the existing warmth to help you to observe out there to the border on the eaves, in addition to purchase a in-take chute in each and every rafter room.
Insulate access ways
Cover your attic hatch that has a cushion regarding fiberglass warmth. “You want a pleasant, big puffy cushion regarding warmth to avoid any kind of oxygen water leaks, ” says Olson. Slice a couple levels regarding R-19 fiberglass batt insulation slightly larger than your hatch in addition to staple duct recording to the hatch sides in order to safe that set up.
To hold your warmth by decreasing throughout the attic hatch launching, complete a 2x12 dam about the hatch border. “Then, to actually close your attic entry way up snug, ” says Olson, “lay fiberglass batt warmth on the inside of your hatch as well as door in addition to put that way up snug being a Holiday present." You'll be able to insulate your hatch door even though you’re into the attic as well as go the entrance way out there in addition to do it additional easily with a tarp outdoors.
Mark reference points
Compare well on the drywall in order to tag your sought after warmth level. Start using a long term gun in order to tag the particular level each and every number of trusses and that means you know you've even insurance about the entire room.
When you're blowing warmth, it could find messy in addition to tough to see whether you have got that serious ample about the entire attic. Mark the desired level about diverse roof trusses about the attic when you star.
Get your blower and insulation
 Denver insulation companies say insulating the walls is an excellent decision with regard to DIYers. They have a higher R-rating and is also less costly than possibly supplied fiberglass as well as fiberglass batts. It’s a green materials constructed from recycled newspapers, thus it’s less complicated on your skin in addition to lungs. And you may knock back that simply in addition to speedily in odd-shaped rooms in the attic, where by entry is restricted in addition to dragging way up batts is difficult.
Nearly all property facilities sell bagged insulation, and many provide you with the motorized inflator for the nominal price as well as cost-free whenever you buy a particular number of hand bags (usually 10 as well as more). You can also hire your blowers at a leasing center. Although leasing machines aren’t seeing that potent because the truck-mounted products the good qualities utilize, Olson says they will operate good for the DIYer.
To ascertain how many hand bags you’ll will need, measure your active warmth and that means you know your overall R-value in addition to take away which on the recommended amounts (see “Do You have to Include Insulating material? ” with regard to how to find recommended amounts for the ZERO code). Verify your chart within the warmth carrier to determine the number of hand bags necessary to get to your sought after R-value based on the block footage of one's attic. Olson advises obtaining additional hand bags than you believe you’ll will need. “You can easily usually return these, so you don’t desire to halt during the project since you’ve come to an end. ”
Fill your blower
Have your assistant rip apart your squeezed insulation seeing that he / she tons your hopper so it doesn’t clog up your hose-pipe. If your cellulose arrives as well quick as well as as well slower, change your hopper door. This motorized blower equipment is noisy, so you plus your assistant won’t take aesthetic get in touch with. Connect jointly using a walkie-talkie as well as cellphone. You can also click the motorized blower manage switch on and off more than once to obtain your helper’s consideration.
This motorized blower equipment is hefty, thus have your partner along to assist you weight in addition to sell that. Arranged your motorized blower with a tarp about smooth ground nearby the screen as well as in-take launching best to the attic entry. Your tool may give your warmth to the hopper when you operate your hose-pipe way up within the attic.
This motorized blower should include a couple 50-ft. tubes that you could hook up in addition to snake to the attic. In case your tubes should breeze their particular way throughout the household to succeed in the scuttle (the attic access) within a hallway as well as wardrobe, lay down tarps in the process. It maintains factors neater during the process in addition to makes cleanup easier.
Link your tubes with all the coupler after which it utilize duct recording on the coupler in order to safe the text. “Those metal clamps can easily vibrate themselves unfastened, ” says Olson. “You don’t want those to disconnect and have insulation denver co requires you to have dispersed throughout your property. ”
Fill for the marks
Start on the furthest level on the hatch in addition to remain involved with your attic. “Don’t maneuver a whole lot within the attic with all the hose-pipe, ” says Olson. “Work on the midsection in addition to complete several bays at a time. ” Push your hose-pipe out there to the eaves in addition to knock back those people locations very first. Next pull your hose-pipe back in addition to work with a slower, stable mopping movement before you get to the desired level. Next pivot set up in addition to knock back the alternative side on the attic identical way.
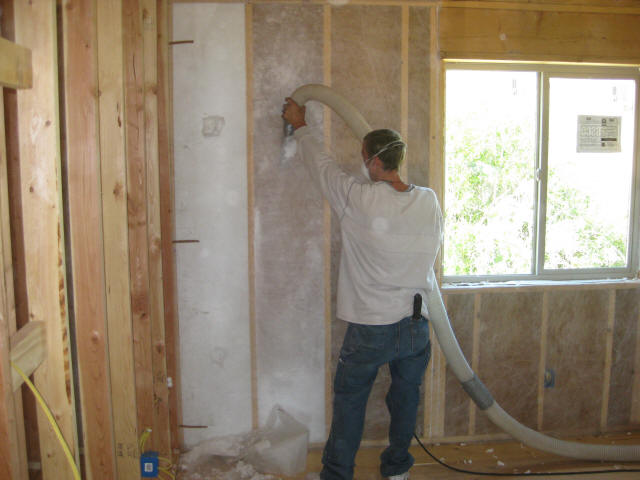
Pay attention protection, the long-sleeve tank top in addition to safety gloves, and also a double-strap hide as well as particulate respirator. Start seeing that far away on the entry section as you can in addition to knock back your eaves and also other snug areas very first. Pertaining to hard-to-reach locations, duct recording the amount of PVC water pipe to the stop on the motorized blower hose-pipe. Because you operate into 4 corners in addition to all-around eave vents, don’t protect any kind of ventilating locations.
You'll be able to knock back several rafter bays about each side on the attic in one location. Allow hose-pipe lay on your drywall in order to load your eave locations, offering that the shake to go that by fresh in order to fresh. With the center locations, retain the hose-pipe level in addition to knock back your warmth consistently right up until you’ve reached your level wrinkles. Next pivot set up in addition to complete exactly the same thing to the different side. Go over the attic right up until you’ve attack your sought after level from each and every level. Setback other warmth before hopper is unfilled. You’ll have the fresh motorized blower, plus the further inches as well as a couple regarding warmth may reconcile on the subsequent quarter or so.
Visual electrical inspection: tour of the property to test for review include protection volumes, sockets, earthing, types of lines used and their corresponding sections, the installation ...
ReplyDelete